.jpg)
Showing posts with label Ideas. Show all posts
Showing posts with label Ideas. Show all posts
Thursday, November 7, 2013


Wednesday, September 4, 2013

Tuesday, April 2, 2013
Wednesday, March 13, 2013
Angela's super amazing gluten-free, vegan and PORTABLE homemade protein bars - 7 ingredients, NO refrigeration!!
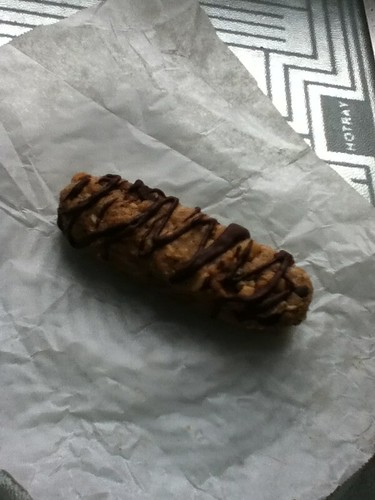 So, I'm happy to announce that my great homemade protein bar experiment was a success!! This little guy is from my first batch... ten days later with no refrigeration! I've wanted to do a homemade protein bar for awhile now since most of the better tasting ones aren't gluten free and the list of ingredients on some of them is horrifying! My biggest beefs with all the recipes I had previously found were:
- They needed to be baked to death.
- They had a list of ingredients just as long and strange as the store bought kind.
OR (and this was the worst and most prevalent one)
- They needed to be kept in the refrigerator.
I'm sorry... but isn't the whole point of these to be quick, easy and portable? It seems pretty silly to make the effort if you need to keep them in the refrigerator all the time to keep them from becoming a sticky mess, doesn't it?
Needless to say, I decided it was time to throw my hat into the ring and figure out a better way to do these. Mine have only seven ingredients plus they are gluten free and vegan. The best part? TEN days after making a batch, they are solid, not sticky and still delicious with ZERO refrigeration!!
Here's day ten up close and personal:
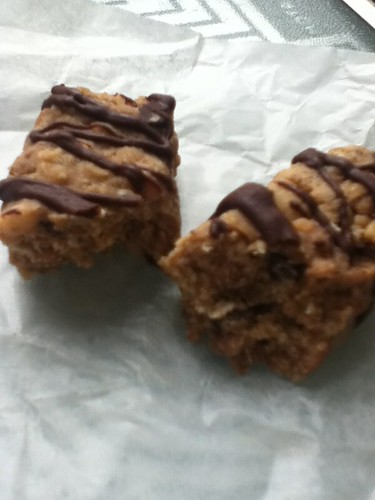
Angela's super amazing no-bake, gluten-free, vegan and PORTABLE homemade protein bars
Here's what you'll need:
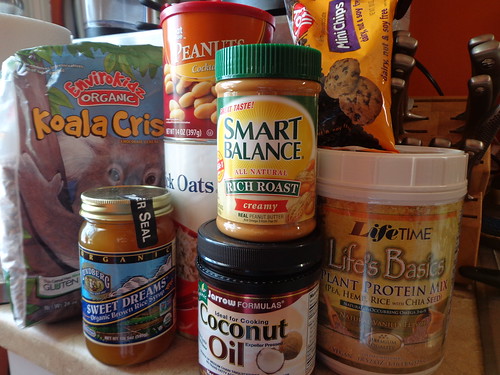 |
| note: coconut oil is only for the optional melted chocolate that I'll talk about later |
1/2 cup - Peanuts or other nuts
1/2 cup - Quick or Rolled Oats
2 servings - Protein Powder (I use THIS ONE because it's agave-free, dairy-free and the price is great)
1/4 cup - Nut Butter of your choice (I went with peanut because I had it on hand)
1/4 cup - Brown Rice Syrup
3 tbsp -1/4 cup Add-ins like Mini Chocolate Chips (I used these awesome dairy free ones)
- You could also use chopped dried fruit, seeds or extra nuts - anything shelf stable will do. Aim for just shy of 1/4 cup for proper yield
Prep time - 20 minutes, Inactive (drying) time - about 1 hour.
Yield: 10 bars
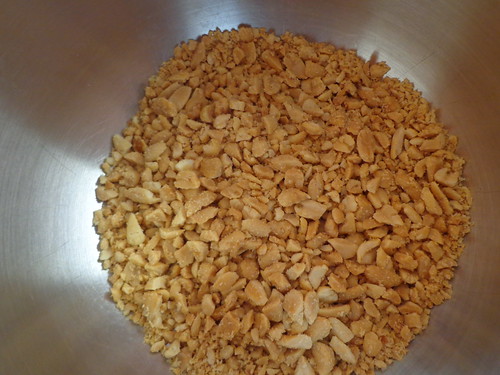
I like to buy whole nuts and chop them myself, it's easy and cheaper, plus they don't get stale as fast. You could buy pre-chopped ones if you wanted to save a little time. Otherwise, whiz them in the food processor for a few seconds or put them in a bag and hit them with a rolling pin... whatever works. For these, you don't want to go too crazy, the nuts are there to add texture so a few big pieces are fine... mine looked like this:
Throw the nuts with all the other dry ingredients in a bowl and then mix your nut butter and brown rice syrup together. If you're a crazy person, like I am, you'll mix them right in the measuring cup...
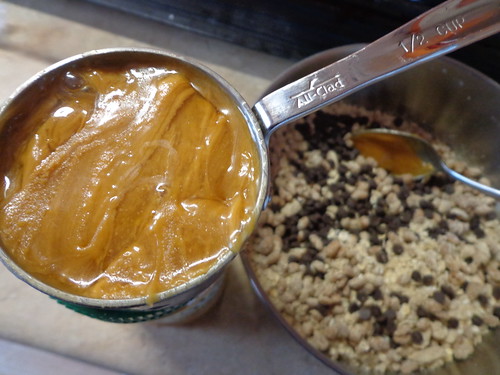
Now here's where the trade off for no baking and no refrigerating comes in. These are kind of a pain to mix. You need to work the nut butter and syrup all the way through the dry mix. It takes awhile and there's a lot of smooshing and bowl scraping involved. I promise, it's worth it. You want the mixture to start making little evenly distributed clumps, sort of like a dry pie crust mix with no big lumps. It should look like this:

Now you're going to add a tiny bit of water, 1 tbsp at a time, but no more than 4tbsp. You just want to moisten the mixture enough to hold together, too much water and they won't form bars. You'll know you're at the right consistency when there's no more dry protein powder hanging out at the bottom of the bowl and the mixture starts to stick to the spoon a little bit. It will look like oatmeal cookie dough at this point:

Now the fun part! Working with small handfuls form the mix into bars, really squeeze the mixture together, so they don't fall apart when they dry. Mine are about the same width as my middle and ring finger and a little longer because I just eyeballed it using that as a guide. They don't have to be perfect, or even in bar form, just make sure that they are compact. I got 10 bars with a tiny bit extra to sample... Lay them on a piece of wax paper or parchment and let them sit out so the outside dries up a little bit. I gave mine about an hour...
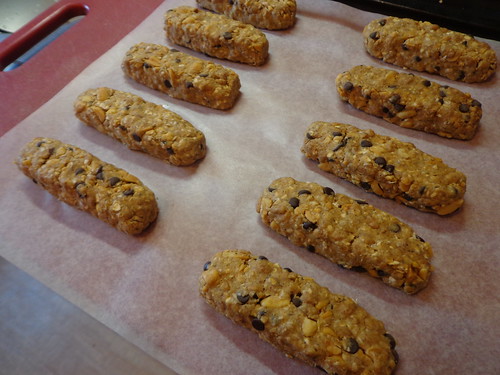
When the tops are dry to the touch, you can wrap the bars up in squares of wax paper and toss them in an airtight container or baggie. Mine lasted a full ten days with no refrigeration, in fact they probably could have gone a bit longer because the one I ate on the tenth day (that little guy in the first picture) still tasted perfect. Now, if it's really warm or humid where you are, you may want to store them in the fridge just to be safe. But they should travel perfectly well during the day once you take them out.
Speaking of the one in the first picture, you probably noticed the chocolate drizzle... I did that as an experiment to see if they would hold up. They definitely did! I just melted some extra chocolate chips and a tiny bit of coconut oil (to smooth and temper it) then drizzled away. I did the hour of drying (uncovered) in the refrigerator to set the chocolate, but then I took them out and held them at room temperature for the full ten days and they were totally fine. These wouldn't hold in really warm temperatures though, obviously. Chocolate + heat = big gooey mess.
With the ingredients listed above, (same brand of protein powder, peanuts, peanut butter and 3 tbsp mini chocolate chips- *no extra melted chocolate*) these have 212 calories, 10g of fat, 22g carbs and 10g of protien! They come in really close to the Nature's Valley gluten free protein bars that I love- but these have less than 1/3 the ingredients and I know how to pronounce them all! If you sub chocolate chips out, you could adjust the carb and fat content a little. However, I have a severe peanut butter & chocolate addiction, so these hit the spot for me as is...
Again, if you try these out... and you should, right away... please come back and tell me what you think!
Friday, March 1, 2013
Today I may have invented something amazing....
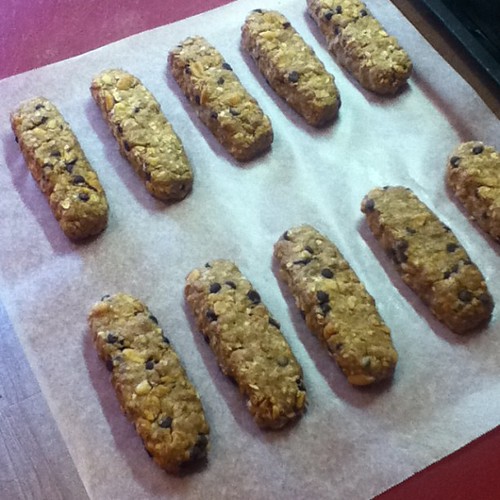 These, my dear friends, are what I hope will turn out to be homemade gluten free protein bars that are actually portable. This is my test run. These babies are going to be eaten over the next ten days to see whether or not they will keep without being refrigerated. I know this seems like it would be an obvious requirement. However, trust me, after sifting though literally fifty or more that needed to be kept in the refrigerator, apparently it's easier said than done. I think the main issue is that homemade bars aren't loaded with preservatives. In fact, these are only seven ingredients!!! This is definitely a good thing, but there are a lot of things to consider if you want to avoid the chemicals. Obviously, spoilage is a big concern. I've managed to deal with that by using only shelf-stable ingredients. If nothing in them needs refrigeration, then the bars themselves shouldn't (hopefully). Another less obvious issue is texture. Many of the recipes I read required refrigeration otherwise the bars would become big gloopy messes. I think I may have solved that issue also by substituting elbow grease for liquids. These are never a sloppy mess to begin with so it stands to reason that they won't magically become that way over the next several days, only time will tell. Wish us luck! I did the nutrition info on SparkPeople and they come pretty darn close to the $4.00/box Natures Valley bars that I've been inhaling, only these are cheaper and much better for you. Also, seven ingredients vs. 20+. I think that's a win-win. If they survive the ten day test, I'll be posting a step by step with the recipe! Stay tuned, and cross your fingers!!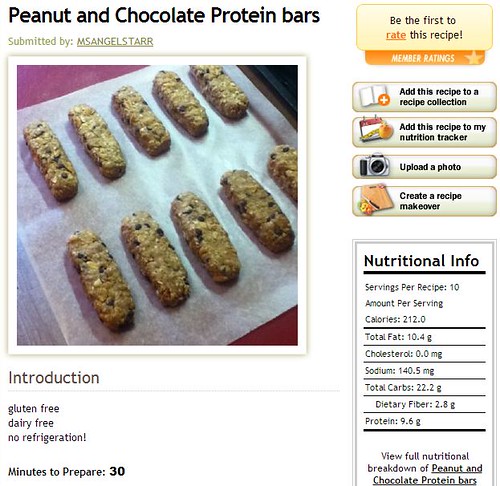
Saturday, December 15, 2012
Aurora's Totally Awesome Birthday Carnival Party!!
.JPG)
As usual, the pictures speak for themselves...
Enjoy!
.JPG) |
| Presents for the birthday girl from mama. |
 |
| Treat Boxes! |
.JPG) |
| Decorations! |
.JPG) |
| Duck Pond! (I was pretty proud of this idea!) |
.JPG) |
| "Concession Stand!" |
.JPG)
 |
| A few more highlights of my handy work and Aurora enjoying the results. |
.JPG) |
| She wouldn't even keep the clown nose on long enough for a picture! |
.JPG) |
| Woo-hoo, presents!! |
.JPG) |
| Aura's Build-a-Bear Snowman from Auntie Rachel! |
.JPG) |
| Happy Biiiiirthdaaaaay! |
.JPG) |
| Mmmm. |
.JPG) |
| Hanging out IN the duck pond post-party, of course. |
.JPG) |
| Oh, and also.... We. Are. Dorks. |
Wednesday, July 11, 2012
Wordless Wednesday XXXVII - (My idea of a kiddie pool)
 |
| We bought this big galvanized steel tub for planting. |
 |
| But in the meantime... |
 |
| Aurora had some fun in it! |


 |
| Oh, and mama snuck in to soak her feet! |
Thursday, June 7, 2012
My Amazing Biscuit-Crust, Deep Dish Pizza!!

Well, I made it again and this time I paid attention and took pictures! I was inspired by an episode of America's Test Kitchen where they tried to recreate Chicago deep dish pizza. As I watched them making the pretty labor intensive dough I thought to myself 'Hmm, that looks just like biscuit dough.' And boom! Inspiration hit. There are a few recipes out there for pizzas made with biscuit dough but most are pretty boring or really complicated. There aren't many for deep dish pizzas either, they tend to be more of a mini pizza made on flattened biscuits. Probably still yummy, but trust me, what I came up with is much better. This is a thick and hearty deep dish pizza that you make in a plain old 9" cake pan! The other plus side? This pizza is super inexpensive to make! Actual cost was under $7 for the WHOLE THING! Even if you don't have any assumed staples handy (like cooking spray or butter and Italian seasoning) it should still come in under $15 and you get at least 4 servings out of it. You can throw away your takeout menus now and thank me later.
Here's what you'll need:
- -butter, margarine or cooking spray for greasing your pan and coating crust
- -2 small (7.5 oz) cans of biscuit dough or 1 large (small ones are way cheaper)
- -1 28oz can of diced tomatoes
- -pizza seasoning or Italian seasoning
- -2 cups shredded cheese (your choice, I used an Italian blend)
- -Toppings of your choice- about 2 cups (I used mushrooms and turkey pepperoni)
- -THAT'S IT!
The first step, and you can do this hours ahead of time, is to open and drain your tomatoes. They need to be very well drained. I usually let mine sit in the colander for an hour or so and then put them on a paper towel lined plate to season them. I use Williams-Sonoma pizza seasoning but that's only because I'm obsessed with it. Penzey's has a great one as well. Any Italian seasoning blend will do really, but I'd probably throw in a little extra garlic and red pepper flakes. I suppose you could skip this step and buy pre-seasoned tomatoes, but I think this way is tastier. Make sure those suckers are almost dry so you don't get a soggy pizza!
 |
| <3 this stuff. |
When you're ready to start cooking, you'll want to heat your oven up to 400 degrees and generously grease or spray your 9" cake pan. I think butter or margarine is best for this. Sticking isn't much of an issue with biscuit dough but the butter/margarine will give a nice golden color to your crust and keep it from drying out.
 |
| I use 50/50 butter blend for everything. Butter taste, half the guilt! |
Next up is the crust! I prefer to buy two small packages of biscuits. This is because I'm cheap and these are usually under a dollar each. If you get a super deal on different ones, go for it. You're just aiming for somewhere around 15-16oz of dough for the right thickness of crust. Get them out of the cans and smash them all together. No need to be perfect and you don't need to do much kneading. You just want all the biscuits to be together without separating but you don't want to overwork the dough.

Once you've done that you'll grab your cake pan and press the biscuit dough down evenly towards the edges of the pan. This is going to be a little slow going because biscuit dough is springy. Have patience, just get it to the edges and let it sit for a couple minutes while you get your toppings together.

I used turkey pepperoni (so I could pretend it's healthy) and mushrooms for my pizza. I love fresh mushrooms but for some reason I get cravings for pizza with the canned kind. Since those are super cheap and zero effort, that's usually what I end up using. Just make sure they're drained really well! Now you're going to take a decent handful of shredded cheese and sprinkle it over your dough. Then press the edges up the sides of the pan about 3/4 of an inch. Pushing the cheese in will help stop the dough from springing back a little, but like I said before don't stress about stretching the dough too much. Just make sure you leave a good lip around the edge and it'll rise plenty in the oven, pushing the toppings towards the middle as it does.

Next, spread a little less than half of your tomatoes and a little more cheese leaving a half inch border.

Then add your toppings! Be generous, the crust of this pizza can be a little overwhelming if it's not stuffed.


Now pile on the last of your tomatoes, still making sure you have exposed crust all the way around.

Then go nuts with the rest of your cheese! You still want exposed crust but if a little cheese strays, it's ok.

Now you can brush the crust with olive oil or melted butter or spay it generously with cooking spray (for browning). Pop your pizza in the oven, after about 5 minutes at 400 degrees, turn the heat down to 350 and cook for another 20 minutes. You'll know it's done when your crust rises up and the edges turn golden. It will usually pull away from the edges a little at this point too. This is a good thing!

Once you take it out of the oven, run a butter knife around the edges to make sure it's not stuck to the sides. It shouldn't be, but sometimes stray cheese can stick a bit. Ok, ready for the one and only scary part? You'll have to 'turn out' this pizza in order to cut it without destroying your pan.
It's easier than you think, just make sure you give the pizza about 15 minutes to rest before you attempt it, otherwise you're gonna lose some serious cheese on top. Then pop a plate over the top and turn your pan upside down. It shouldn't take more than a wiggle to loosen it.
Then plop it back right side up on a baking sheet or another plate and dig in!!
It's easier than you think, just make sure you give the pizza about 15 minutes to rest before you attempt it, otherwise you're gonna lose some serious cheese on top. Then pop a plate over the top and turn your pan upside down. It shouldn't take more than a wiggle to loosen it.
Then plop it back right side up on a baking sheet or another plate and dig in!!
 |
| Enjoy!! <33 |
Saturday, April 7, 2012
It's beginning to look a lot like... um... Easter.
So tomorrow is Easter! I wanted to do something cute and fun for Aura but I was a little stumped since she's still too young for candy. I may give her a little bite of marshmallow or chocolate but that seemed pretty stingy! I settled on a little stuffed puppy, some no-spill bubbles, and a couple little books for her basket. Then I came up with this cute idea for an egg hunt without the candy. I put pom poms in her eggs! She's intrigued by them when we go to baby yoga so I know she'll be excited. Plus they are color coordinated with the eggs so it'll work like a sorting game too! Genius if I do say so myself!

Ta-da! Mission Candy-free Easter accomplished!
 |
| The bag is goodies from Grandma J. and Grandpa F. |
What are you guys doing for Easter? Candy or no? Any good ideas I can steal for next year (haha)?
Tuesday, February 7, 2012
I'm off to Hawaii!!
Just got back from dropping Aura off at her Nana Poo's house (SO hard) Our flight leaves at 6a.m. so I have quite a bit of time to kill. I've been occupying myself with little games like "How many things can I possibly fit in my one quart baggie of liquids/gels. The answer?
Everything I could possibly need:
 |
| Finally! My sample-size hoarding has come in handy!! |
 |
| Yep, it's all in there. |

I'll tell you guys everything I managed to cram in there when I get back!
Have a good week everyone!! <3
Subscribe to:
Posts (Atom)
